Make a Boring List Impressive with This Simple GSAP Effect
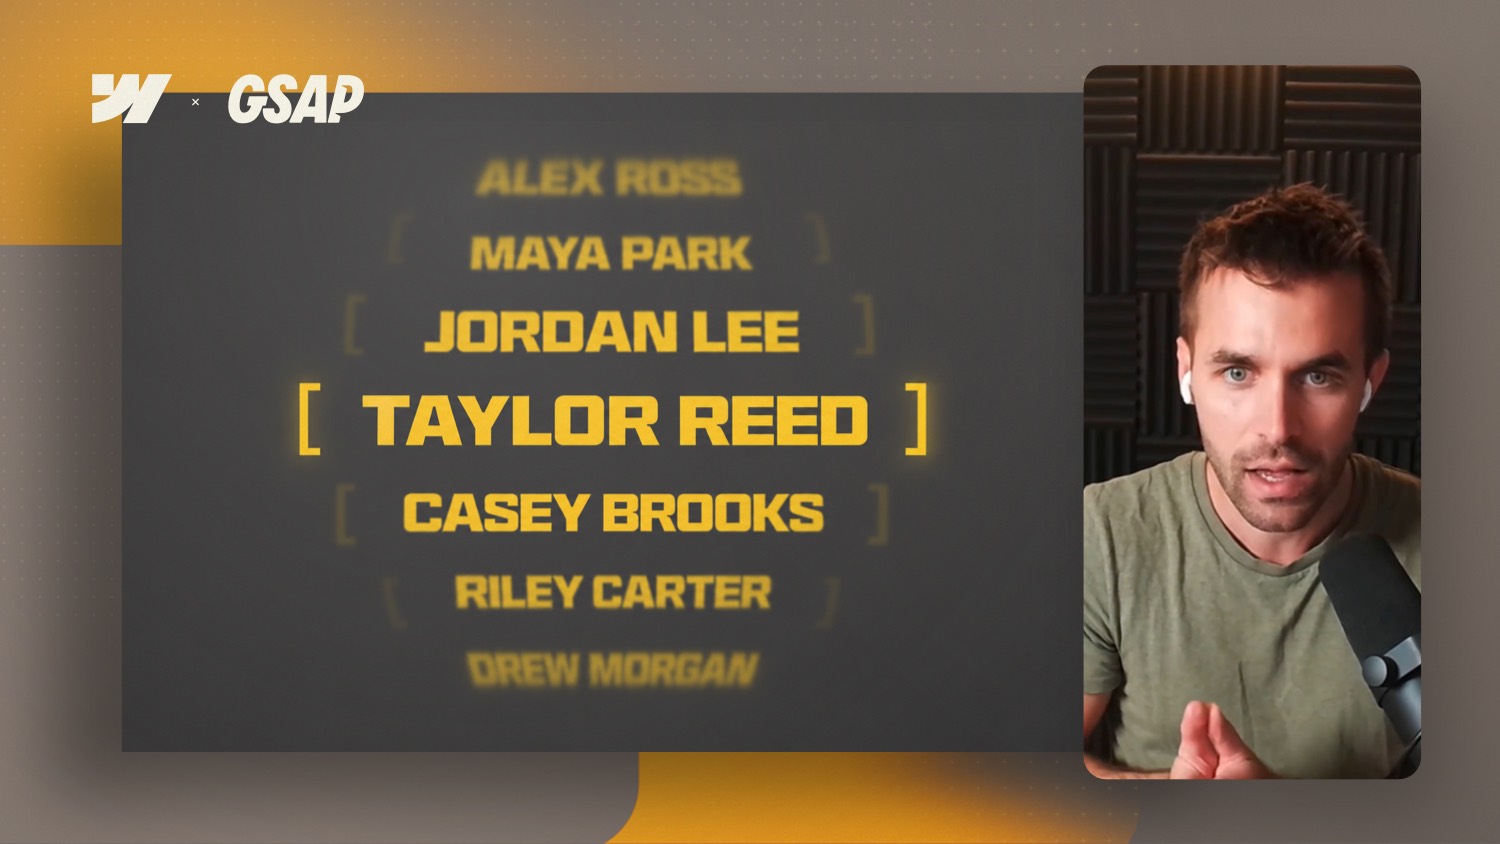

One tiny scroll effect and suddenly a simple list feels much more impressive. In this Webflow tutorial, you build a typography scroll animation with GSAP, where each name scales up in the center of the screen and animated brackets appear around it.
You learn how to connect a CMS Collection List, style the names with clamp and vw so nothing wraps on mobile, and set up a scrub scroll animation that scales the text as it moves through the viewport. Then you toggle an is-active class at the center point to reveal the brackets, animated smoothly with a bit of custom CSS.
At the end, you can turn each item into a CMS link and use the effect for team members, projects, categories, services, or any other type of list. Grab the free cloneable of this project in the description, together with a few more scroll effects you can copy into your own builds.
A Simple Typo Scroll Effect That Makes Any Section Feel Premium
Small scroll effects can completely change how a website feels. In this tutorial you learn how to build a clean typo scroll animation in Webflow with GSAP, where each name scales up as it reaches the center of the screen and animated brackets appear around it.
What makes this effect so useful:
- It runs on the Webflow CMS, so it scales to as many items as you need
- It works for team members, projects, categories, services, or any other list
- It stays smooth because you animate transforms instead of layout properties
What You Need Before You Start
Make sure these things are in place before you build the animation:
- A Collection in the Webflow CMS with at least a name field
- A Collection List on your page connected to that collection
- An
is-activeclass that already exists somewhere in your project - A basic understanding of the GSAP scroll interaction in Webflow
Setting Up the CMS Collection List
Start with a collection list that pulls in your items dynamically. Work through these steps:
- Connect the collection list on your page to your CMS collection
- Bind the name text element to the name field
- Wrap the name text element inside a div and give it a team item text class
- Set the font size with
clamp(), for example a maximum of 5rem and a preferred value of5vw
Why vw as the unit? Because it keeps the names on a single line even on smaller screens, so nothing wraps awkwardly on mobile.
Adding the Bracket Elements
The brackets sit before and after the name and animate in later. Set them up like this:
- Add a bracket symbol before and after the name inside the team item text div
- Give each bracket a team item bracket class so you can target it with custom CSS
- Add an is-last combo class to the closing bracket on the right
The is-last class lets you move the right bracket in the opposite direction of the left one, so they animate apart from the center.
Building the Scrub Scroll Animation
Now to the core animation. Select the team item as the trigger element, open Interactions and choose the GSAP scroll interaction. Configure the trigger with these settings:
- Start: when the item enters the viewport from the bottom
- End: when the item leaves the viewport at the top
- Type: scrub on scroll, so the elements animate while they move through the viewport
Then build the timeline itself:
- Target the team item text and animate the scale, not the font size
- Scale up to around 1.2 so the text appears to grow without expensive layout changes
- Set the peak at the 50% mark in the timeline
- Duplicate the step to create an out animation that scales back to 1
- Name the two steps clearly, for example in and out, so the timeline stays readable
Revealing the Brackets at the Center
The brackets should only appear when a name sits in the middle of the screen. Create a second interaction on the team item:
- Add a class exactly at 50% in the viewport
- Remove it when the element leaves the center, again at 50%
- Use trigger actions so the animation plays at the center and reverses when it leaves
- Add a set action that toggles the
is-activeclass on the team item
Keep two things in mind here:
- The
is-activeclass has to already exist in your project before Webflow lets you select it - You toggle the class rather than just set it, so the effect plays back and forth cleanly as you scroll
Animating the Brackets with Custom CSS
In a custom embed, target the team item brackets and give them their movement:
- Give the first bracket a small negative
translateX - Give the last bracket a small positive
translateX - On
is-active, set both brackets toopacity: 1and back to their original position
For performance, pay attention to your transitions:
- Avoid transitioning
all - Transition only
opacityandtransform - Animate both brackets with their own easing and timing if you like
Turn It Into a Link
If you want the names to be clickable, convert the team item text into a link block and connect it to a CMS detail page or any URL you like. That way the same effect works as a stylish navigation for your team or project pages.
A Small Effect With Big Impact
This is a quick effect you can drop into almost any client project to give a section that extra active feeling. If you want to grab the finished setup, the free cloneable is linked in the video description, together with a few other scroll effects you can copy into your own projects.
Want to go deeper into GSAP in Webflow? The Webflow GSAP Interactions Masterclass covers timelines, scroll driven animations and much more, step by step.